
Walking into a college lab feels easier when the equipment already looks familiar. You do not need to memorize an entire supply cabinet before your first class, but knowing the purpose of common tools helps you follow instructions more confidently.
Getting comfortable also helps you avoid simple mistakes. For example, a beaker does not measure liquid as precisely as a graduated cylinder. Once those little differences make sense, the lab starts to feel less intimidating. Here are the lab tools every science student should recognize.
Start With Beakers and Erlenmeyer Flasks
Beakers appear in nearly every introductory science lab. Students use them to hold liquids and mix solutions during experiments. The wide opening makes pouring easy, while the side markings give only a rough idea of volume.
An Erlenmeyer flask narrows toward the top. That shape gives you more control when swirling a liquid because the contents stay farther from the opening. If an instructor asks you to mix a solution gently, the flask usually makes the job easier than a beaker.
Measure Liquids With Graduated Cylinders
When an experiment calls for a more accurate liquid volume, reach for a graduated cylinder. Its tall, narrow shape spreads the measurement marks farther apart than a beaker does. That spacing makes small volume changes easier to read.
Set the cylinder on a flat surface before checking the liquid level. Holding it in the air makes the reading less reliable because your angle shifts.
Read the Meniscus at Eye Level
Many liquids form a curved surface inside the cylinder. Scientists call this curve the meniscus. Bring your eyes level with the liquid and read the measurement at the correct point on the curve. Your instructor will show you where to read based on the liquid in the cylinder.
Get Comfortable With Pipettes
Pipettes help students move small amounts of liquid with control. A basic transfer pipette works well when an experiment needs drops rather than an exact volume. More advanced lab courses introduce micropipettes for much smaller measurements.
Set the correct volume before attaching a clean tip, and press the plunger smoothly rather than rushing. Good technique protects the sample and gives you a more dependable measurement.
Micropipettes Need Extra Care
Never force the volume dial beyond the instrument’s printed range. Follow the procedure for changing tips, especially when contamination would affect the results. Treat the instrument gently and return it to the proper holder after use.
Use Test Tubes for Small Reactions
Test tubes give students a simple way to observe reactions using small amounts of material. Their narrow shape works well when you need to watch a color change or compare samples without preparing a large volume.
Place test tubes in a rack whenever you need both hands free. The rack keeps them upright and lowers the risk of spills. When heating a tube, follow your instructor’s procedure and keep the opening facing away from people.
Measure Mass With a Laboratory Balance
A laboratory balance gives you a mass reading rather than a rough visual estimate. Introductory labs often ask students to measure a solid before adding it to a solution.
Place the proper weighing container on the balance first. Tare the balance so the display returns to zero, then add the sample. This step removes the container’s mass from your reading.
Keep the weighing surface clean as you work. If powder spills, follow the lab’s cleanup procedure before moving on.
See More With Microscopes and Slides
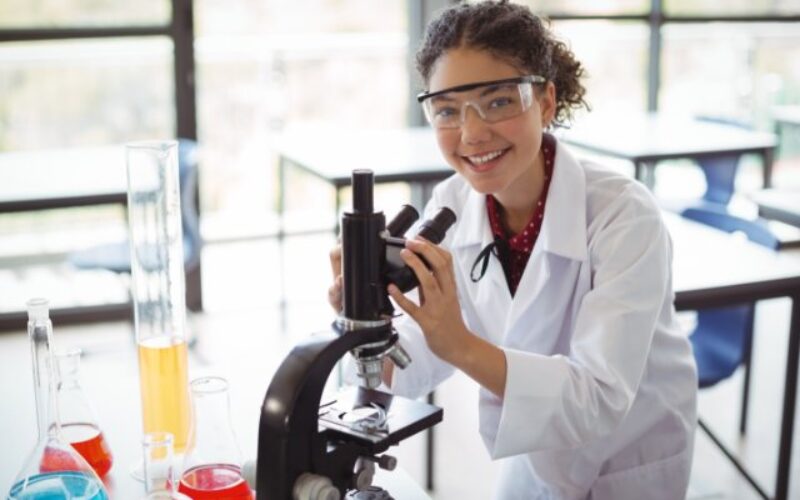
A microscope lets you examine structures too small to see clearly with your eyes alone. Before turning knobs, learn how the stage and objective lenses work together. Begin with the lowest magnification because it gives you a wider view of the specimen.
Once the image comes into view, make small focus adjustments. Jumping straight to high magnification makes the specimen harder to find.
Handle slides by the edges when possible. Fingerprints or debris on the viewing area interfere with a clear image.
Handle Forceps and Dissection Tools Carefully
Forceps help you grip small specimens or materials without relying on your fingers. Dissection labs also introduce sharp instruments, so control is more important here than speed.
Many lab instruments use stainless steel because the material handles repeated cleaning and resists corrosion. Understanding what stainless steel is helps explain why it appears so often in laboratory tools. Stainless steel contains iron and chromium, and the chromium helps form a protective surface layer that resists rust.
Return tools clean and dry according to your lab instructions. Report any bent tips or damaged edges before another student reaches for the instrument.
Respect Heat Sources and Hot Glass
Hot plates and burners quickly raise a lab’s risk level. Treat glassware near a heat source as hot until you know otherwise. Clear the workspace before heating begins so notebooks or loose materials do not crowd the area.
Use the proper holder when moving hot glassware. Never test the temperature with your hand. If a procedure requires direct heating, follow your instructor’s setup instead of improvising.
Know the Safety Tools Before an Emergency
Safety equipment matters most when you already know where to find it. Before starting an unfamiliar lab, take a moment to notice the emergency equipment in the room.
A quick check should include:
- Locate the eyewash station before the experiment starts.
- Find the safety shower and keep the path clear.
- Check where your instructor stores spill supplies.
- Know the exit route your class should use.
Don’t wait for an accident to learn these details. A few seconds of attention at the beginning of class gives you a clearer response if something goes wrong.
Build Confidence One Tool at a Time
Nobody enters an introductory college lab knowing every instrument on the bench. Your familiarity will grow as you connect each tool with the job it performs. Pay attention when your instructor demonstrates equipment, then repeat the same handling habits each time you work.
As you become more familiar with the lab tools every science student should recognize, the equipment stops distracting you from the experiment itself. You spend less time wondering what to pick up and more time understanding the procedure in front of you. That confidence gives you a stronger foundation for future science courses.
Image Credentials: WavebreakMediaMicro, 141799592
-------------------------------------------------------------------------------------------------------------
end of post idea
-------------------------------------------------------------------------------------------------------------
view home improvement ideas at our Photo Remodeling center
Helpful article? Leave us a quick comment below.
And please share this article within your social networks.